Showing posts with label recipes. Show all posts

Wednesday, December 17, 2008

holiday tipples

After last weekend, I think I've realized why politicians repealed Prohibition in December; can you imagine the holidays without drinks?

FRIDAY 8:00 pm

Hot buttered rum and a movie.

Hot Buttered Rum Batter adapted from Lance Mayhew
1 stick butter, room temp
¾ c brown sugar
¼ cup agave nectar
½ tsp cinnamon
pinch salt
1/8 tsp nutmeg
1/8 tsp allspice
1/8 tsp clove

Cream the butter in a stand mixer and, with the mixer running, add all additional ingredients and beat at a medium speed until incorporated. Scoop the butter out onto parchment or wax paper and roll into a well-wrapped log. Put it back in the refrigerator to chill until needed.

To make a hot buttered rum, simply slice a good dollop off of the batter, add to a mug with 2 oz of good, aged rum (Mayhew likes Bacardi 8), fill with hot water, stir to incorporate, and enjoy.
SATURDAY 1:30 pm

House Spirits Annual Holiday Booze Bazaar, with tastings of Marteau Absinthe, Ransom Grappas and Old Tom Gin, Sub Rosa Tarragon and Saffron Vodkas, and House's own Aviation gin, Krogstad Aquavit, Medoyeff Vodka and Apothecary Ouzo. A yearly excuse to eat an ungodly amount of free cheese and chocolates while sipping some the best artisan booze in the city.
SATURDAY 4:00 pm

Anchor 2008 Christmas Ale at the Bye & Bye. The beer and the company was better than our friend's unwittingly vegan grilled-cheese.
SATURDAY 7:30 pm

Table-side Spanish coffees at Huber's - Portland's oldest restaurant, specializing in "turkey-based meals." We'd never been and friends of ours thought it'd be fun for the holidays. I wanted to ask the bartender so many silly questions. Do you ever spill? Do you ever burn yourself? Is this why you guys have a carpeted floor? How do you light that match with one hand? Did you have to shave your head for this job?
SUNDAY 10:00 am

House-made eggnog from Moxie Rx. Gathered from around-the-corner in a snow storm, doctored at home with Buffalo Trace.
WEDNESDAY 8:30 pm
Looking at the forecast, tonight feels like a hot toddy evening

Monday, November 24, 2008

the raw and the cooked

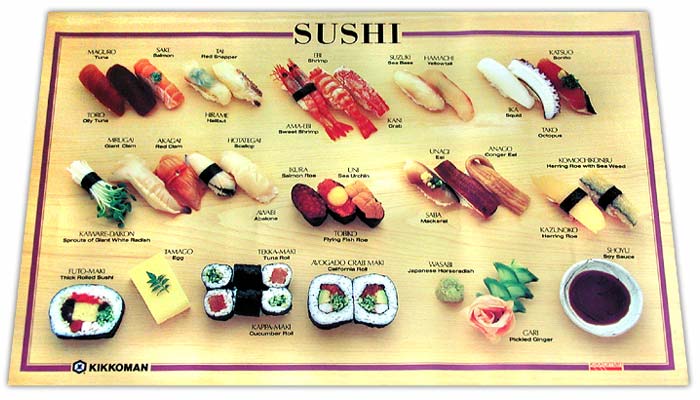
If two years ago you asked me for a run-down of my favorite foods, sushi would definitely have made the cut. That rich flavor and unctuous texture of the raw fish was enough to make me drool. Like I'm doing right now thinking about it. You can call me a hypocrite for mocking "living" fudge or raw bread, but some things are meant to be cooked and some aren't. Fish demands a gentle hand at the stove, making it an excellent candidate for being served raw. Bread, on the other hand, should be baked; not dehydrated.

But I'm getting off-topic - the point is just how much A and I used to love sushi. Today? That's a different story. It sure sucks to get a conscience. Maybe you can chalk it up to to reading too much when daily reminders of doom-and-gloom, social and environmental collapse leave you morally paralyzed. The more and more we read and heard, the worse we felt about eating seafood. For a sense of the kind of laugh parade that is modern seafood writing, read Mark Bittman's excellent New York Times editorial on the future of fish.

Recently, the Monterey Bay Aquarium Seafood Watch group released a new sushi-centric version of their great sustainable seafood guide (download PDF). Helpfully, it lists all of the Japanese names for the best fish choices. Unhelpfully, you've probably never seen any of the best choices in a sushi restaurant. On top of that, the few choices you have heard of get pretty specific about fishing practices. I'd wager that if you ask most sushi chefs in America if their tuna is US troll/pole caught rather than longline, you'll get a blank stare. Here in Portland, almost all sushi passes through a bizarrely infamous international cult. Hey, maybe they're a sustainable cult, but with only one supplier for most restaurants, there isn't a lot of choice in terms of fish sourcing.


Meet Bamboo Sushi. Brainchild of a former owner of the indie-chic Masu, it couples hip design with focused sustainability. Not only do they espouse green principles and focus on responsible sourcing, they are actually the first Marine Stewardship Council certified restaurant in the US. I think A and I almost wept when we ate there on Wednesday evening - for the first time in over a year, we went out for sushi. Everything was incredibly fresh and their preparations were really inventive. We swooned over each bite of the rolls and awkwardly sawed our nigiri selections in half with our chopsticks to make sure we all got a taste of everything.

To tide us over between visits to Bamboo, maybe we'll have to branch out into other Japanese foods (it's either that or we make miniature gunkan maki rolls with bay shrimp). Luckily for us, Bamboo offers some inspiration - one of their best offerings is a tsukemono plate of pickled eggplant, cabbage, daikon, onion, ginger, peppers, and squash. Over the weekend, we tried out a Japanese-style quick cabbage pickle, piecing together our own recipe from a mix of different books and websites. The results were great, but pickled cabbage just isn't the same as sushi. At least Bamboo has a happy hour, but is "low priced sushi" really a valid excuse to cut out of work early? It should be.
__________

Simple Cabbage Tsukemono
Adapted from Justhungy.com and Dorothy Lesem's
Preserving in Today's Kitchen

1 head of napa cabbage
1 1/2 teaspoons kosher salt
1/4 teaspoon chile flakes
zest of one lemon
1 teaspoon rice vinegar
1 teaspoon fish sauce
1 teaspoon sesame oil

Clean and core the cabbage, chopping the leaves into 1-to-2 inch pieces. Place the cabbage in a large glass bowl and toss with the salt, chile flakes and lemon zest. Cover with a weighted plate that fits inside the bowl and leave to sit in the refrigerator for about an hour. A lot of moisture will be drawn out of the cabbage - drain off the liquid and toss the remaining cabbage with the vinegar, fish sauce and sesame oil. Serve with rice and broth simmered-tofu.

Thursday, August 21, 2008

freezer dreams

A and I both love seafood, and happen to live around the corner from an exceptional fishmonger. Still, we always end up worried about declining fish populations and balk at the high prices of sustainable choices. Then we end up with a quarter-cup of sustainably-miniature Oregon bay shrimp or four runty sardines. Not exactly dinner.

So when the
Iliamna Fish Co. set up an agreement with our CSA farm, Viridian, to offer a salmon share, we signed up before thinking what we'd do with all that fish.

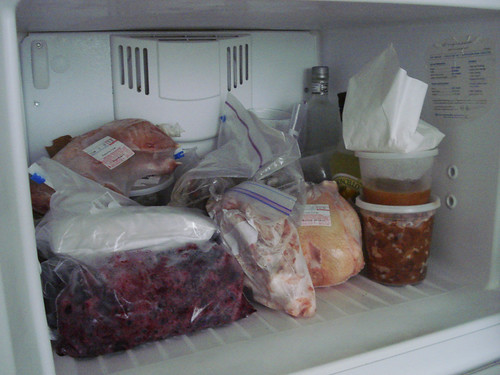
Even after splitting our share with my parents, we still have seven two-foot long planks of frozen fish, bundled in twine. I guess it is time to start thinking up some creative uses for salmon. According to A, our problems did not stem from ordering 25 pounds of frozen salmon, they came from not having a chest freezer. This has been a common refrain around our house for the last few months, as we've packed our freezer more and more full of berries, stock, chickens and freezer jam.

This, I imagine, is what A sees when she sleeps:


Actually, that isn't entirely true; there may be frozen berries and sides of pork leaping over it, as well.

It certainly hasn't helped that some of our friends recently purchased a chest freezer, which they placed in their office, just off of their kitchen. "If they can live with one inside their home," pleads A, "why can't we just fit our own freezer in here?"
pointing to where our couch currently resides. I have heard recommendations for placement everywhere from "in the corner" to "in the closet" to, my favorite, "in the bathroom." I think that everywhere A looks in our apartment, she sees a custom-shaped chest freezer ready to be plugged in. I need to stay strong, because our lack of a chest freezer is the only thing keeping A from ordering 65 pounds of slaughtered hog. Not that I'd be entirely opposed to it.

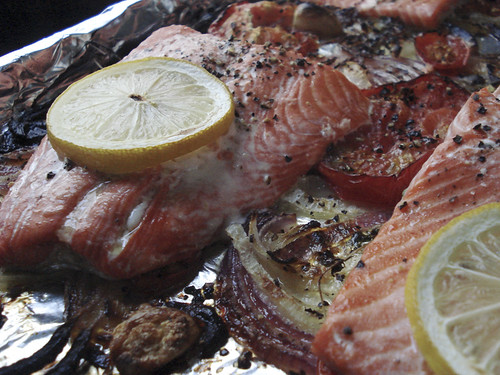
So, how was the salmon? Well, for our inaugural meal, we tried out a recipe from Saveur for
broiled salmon with tarragon, tomatoes, and onions
to use up a bunch of our summer ingredients. It was dead simple and incredibly flavorful. The cooling anise flavor of the tarragon and pastis balance perfectly with the tang of the roasted tomatoes. And the salmon (oh!) was firm and deeply-colored and buttery-tasting.

Right now, as I admit what an amazing deal it was to buy all of this salmon, A is probably claiming her first victory. That, and comparing dimensions of chest freezers online with the width of our doorway.

Wednesday, August 6, 2008

i love the south

Seriously. In the rose-colored romanticized way, because I don't think I'd actually love it if I lived there. Know why? Humidity.

But A and I both have Southern family (and a few transplant friends), so we've had reason to visit a few times, always enjoying it. Southerners are just some truly charming people, right down to the way A's grandma always used to ask for glasses of "wah-uh." I know there are quite a few un-charming Southerners, but that is the beauty of only living in the South of my imagination; I can have a very selective love affair.

At least when it comes to cuisine, I don't need to be too selective. Biscuits, sweet tea, gumbo, crayfish, mint juleps, fried chicken, red beans & rice, catfish, okra (yes), and some damn fine barbecue. I really can't think of a bad meal I've had in the South - I've even come across some of the best Vietnamese food in my life in New Orleans.

Two segments on a recent episode of Good Food nicely reinforced my Southernphilia

The first is a chat about classic sweet tea with Martha Hall Foose, author of a recent Southern cookbook. Now I love sweet tea, but what really caught my attention was the "mailbox" cocktail that she mentioned. When standing around her rural mailbox waiting for yesterday's newspaper to be delivered, she shares a strong drink and some conversation with her neighbors. There's one word to describe this: "genteel." If there's a second, it's "practical."

(It may take a moment to load. Check here if you can't hear it.)

The second is an interview with Shirley Corriher about White Lily brand flour and the quest for the perfect, pillowy biscuit. I love this conversation - everything from her unyielding devotion to an eccentric name-brand product, to the classic one-upsmanship of who boasts the best biscuits:


(Same goes for this one. Check here.)

I could just about die every time she makes that slurping sound to explain the absorbency of the flour.

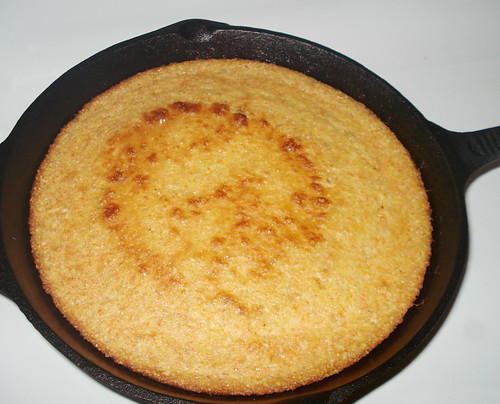
So when I got a hankering for some Southern classics (red beans & rice and stewed greens), I turned to the Lee Bros. recipe for skillet cornbread that we've mentioned before. This recipe can not be stopped. I used three kinds of cornmeal we had laying around (including two great heirloom varieties from Ayers Creek), and subbed in soymilk & yogurt since we didn't have any buttermilk on hand. Results? Still delicious. It is easy, versatile, and the perfect foil for some smoky-ham Southern flavors. Plus, if you are wilting greens on the stove and tending a big pot of stew, this tasty bread just goes right in the oven.


_____________

Skillet Cornbread (Adapted from Lee Bros. Southern Cookbook and necessity)

1 T lard or unsalted butter
1 1/2 c stone-ground cornmeal
1 t baking powder
1 t baking soda
1/2 t salt
1 t sugar
1 large egg
1 1/2 c. whole or lowfat buttermilk (preferably whole) [or 1 c. soy milk and 1/2 c. yogurt if you're scrounging the cupboards like we were]
2 T unsalted butter

1. Preheat the oven to 450. Grease a 12-inch skillet with the lard (or butter), leaving any excess in the pan, and place it in the oven.

2. In a large bowl, sift the dry ingredients together. In a medium bowl, whisk the egg until frothy and then whisk in the buttermilk. Add the wet ingredients to the dry ones and mix thoroughly. Melt the butter in a small skillet over low heat, and whisk the butter into the batter.

3. When the fat in the large skillet is smoking, carefully remove the skillet from the oven and swirl the fat around to coat the bottom and sides evenly. Pour the batter into the skillet; it should sizzle alluringly. Bake for 15 minutes, or until the top of the bread is golden brown and the edge has pulled away from the sides of the skillet. Remove from the oven

4. Cut the corn bread into wedges in the skillet and serve hot.

Tuesday, June 10, 2008

black & tan & black & tan & ...

Listen, Deschutes: it didn't have to be this way. You could have had all the glory for yourself. But you had to go and get all "technical" with me when I asked for a black & tan. Yeah, your brewmasters might have their hang-ups about liquid densities and the feasibility of layering a Mirror Pond Pale and an Obsidian Stout, but I just wanted a beer; not a science lesson. That means that you drove me to this. You made me take this folly on at home where it became even more likely that I'd make a mess out of trying to layer your booze in a pint glass. I still wanted a black & tan better than some old Guinness & Harp; I wanted a domestic black & tan to be proud of.

So, Deschutes, last weekend I pitted the black & tan you wouldn't make for me up against two other West coast breweries in a battle royale of mixed beers. I dragged A along to Belmont Station
to select the contenders (though, I suppose it isn't so much dragging when she could easily spend as much time browsing their British food as I could their bomber selection) . I already had Deschutes in the first slot and figured that two other breweries would be enough for comparison without laying us both out in the process. The second brewery was an easy choice as well: Anderson Valley, which has to be one of my favorite breweries in the country, happens to make both an excellent stout and a great amber. That left the third glass empty. When we asked one of the staff if he had any ideas, he scoffed at the idea of a black & tan and said that if we were mixing beers, we'd be better off going for interesting flavors. That led us to North Coast Brewing, from which we selected two high-ABV beers bound to create a strange brew.

How it went down:

First of all, pouring a black & tan is a lot harder than it seems. You fill your pint glass halfway with an ale, then slowly pour the stout over the back of a spoon so that it doesn't break the surface, but just lies on top as a distinct layer. Ha. So maybe Deschutes was correct and the densities of American beers are just too hard to layer. Or maybe it has something to do with the American spirit that blends diversity into a cohesive whole or some b.s. like that. In any case, I ended up with some dark, blended pints instead of pretty pousse-cafe beers.

Round One: I kicked things off with the Deschutes, giving them the benefit of starting off on a fresh palate. On its own, the Mirror Pond Pale Ale is medium-bodied and very wheat-y. It has a taste of untoasted bread and a big, hoppy punch for a pale. When you take a whiff of the Obsidian Stout, you get a really strong coffee aroma, but the flavor is all roasted nuts and seeds. The Obsidian, too, was fairly hoppy for its class, which just cements my belief that Portland breweries love making hop-bombs.
Mirror Pond + Obsidian = The M.O.
When I blended the two Deschutes' brews, I have to say it kind of improved on the harsher aspects of both beers. The coffee tones of the Obsidian were bumped way up and sharpened with the Mirror Pond's acidity, to give it the character of an African coffee.

Round Two: These might be two of my favorite beers on their own. While I love the Portland hop-addiction, Anderson Valley makes really well-balanced, smooth beers that belie their complexity. The Boont Amber Ale is very malty and has a much rounder flavor than the Mirror Pond. As for the Oatmeal Stout, it leans much more towards the chocolate end of the stout spectrum, reminding me of Hershey's syrup with a caramelly richness.
Amber Ale + Oatmeal Stout = Amber Waves of Grain
Blending these two didn't noticeably improve upon either of the beers, perhaps because they were so good to begin with. Taken together, it was a very full bodied drink and nicely balanced. In a lot of ways, it had a bourbon-like flavor.

Round Three: At this point, A and I were both pretty glad that I'd gone for the 12 oz. bottles, rather than the 22 oz. bombers I'd wanted to get. Judging was certainly getting more difficult and well, you can just forget about my "layering" craft. Our choices from North Coast weren't going to make this any easier - we'd selected two strange, strong beers. For our "light" beer, we chose the Pranqster Belgian-style ale, a yeasty, heavy, ripe-tasting brew. To balance it, we went for an equally imposing stout, the Old Rasputin Russian Imperial. On its own, this stout has a funky sweetness like burnt sugar, and an alcoholic edge with a lightly smokey flavor.
Pranqster + Old Rasputin = Old Russian Joke
This was the wild-card blend of the night. It ended up tasting a lot like a barleywine - it had that classic sweetness with a hot, alcoholic kick. Our last black & tan ended up being the weirdest of the bunch, but it had its own, heady appeal.

Lessons learned? I'm still not going to listen to the pros, but I may need to practice pouring a black & tan sometime when I'm not drinking a black & tan. The two do not mix well, but the beers certainly do.

Monday, March 31, 2008

And now for something a little lighter.

I know my voice has been absent from this blog lately. I know that you have missed my cheerful wit and sharp insight. I have not followed through with my New Year's resolution to "post every two weeks" and I am sorry for it. But, I have good reason.

My mouth was too full.

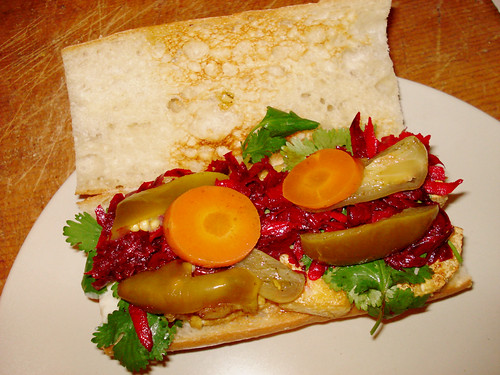
The combination of weekly baking, a food-focused trip to Seattle, the river of chocolate that always seems to flow from Halloween through Memorial Day, and Easter weekend itself - which consisted mostly of eating chocolate, making sweet dough, eating resulting Easter bread and topping things off with yet more chocolate - has been a recipe for a stomachache. Driving home after Easter at my parents' house, with one hand on the wheel and the other buried in a bag of chocolate, I was all too happy to second P's motion that we eat lightly in the coming week. When he brought to the table what is, in my opinion, the ultimate sandwich, I began to look forward to our ritual cleansing.

Despite what one might think, after such gluttony, the P & A detox diet is never a tasteless or particularly spare affair. When I reach my breaking point, I want something simple and relatively light, but with plenty of flavor...just flavor that isn't quite so rich. Often, we turn to our repertoire of basic meals: homemade tomato sauce, braised chard with tofu (do not be fooled - this dish is neither flat, nor flavorless), bibimbop, or, perhaps my very favorite, bánh mì.

Bánh mì sprung out of French colonialism in Indochina and marries traditionally French ingredients like baguette, pâté and mayonnaise with elements from southeast Asian cooking, like cilantro and fish sauce. This combination produces what may be the perfect sandwich - the rich, salty flavors of meat and fish sauce are cut by the tangy brightness of the cilantro and pickled carrots and all is enveloped by soft, chewy, crusty baguette.

My first taste of b
ánh mì came a few years ago, when P and I ventured out to the small, nondescript, strip mall PDX eatery that is Cali Sandwiches. Cali Sandwiches had been recommended in the Willamette Week Cheap Eats Guide as offering tangy, rich and delicious sandwiches for under three dollars. As we were then poor college students with appetites far larger than our wallets would allow, this sounded like a pretty good deal. I cannot remember which bánh mì I ordered (common options are the aforementioned pate, chicken, pork and egg), but I do know that this was the beginning of a beautiful friendship.

If you need another reason to try bánh mì (but, really?? you need another?), I give you this: it is incredibly easy to make. We like to make a pseudo-vegetarian version (vegetarian in all but the fish sauce...), with tofu instead of meat, but you can do as you choose - it is the condiments that make this sandwich. Normally, we marinate the tofu and then broil it, but this last week we fried the tofu instead and it was better than ever. What's that? Anything fried should not count as part of a detox diet, you say? Well, it's a good thing I am too stalwart to be swayed by my peers.

____________________________________________

P & A
Bánh Mì Chay
(has a certain ring to it, no?)

I feel a little ridiculous posting a recipe for this, because, well, it's a sandwich. There isn't much to it. But, since I haven't written in awhile, I thought I should probably add something to fill out my post.

Last time, we added a bit of carrot and beet salad (recipe from Chocolate and Zucchini), which gave the sandwich an earthy layer (from the beets), a tangy garlic zing, and messy drops of beet juice. Delicious.

1/3 cup peanut or vegetable oil (for frying)
1 pound tofu, cut into rectangles 1/2 inch thickness
1 baguette
1 bunch cilantro
1 small container pickled carrots and jalapenos
(we tend to go for the small Herdez cans of carrots and jalapenos, but you can try any brand of pickled vegetables you like, or make your own!)
fish sauce mayonnaise (below) or plain mayonnaise
sweet chile sauce

Fish Sauce Mayonnaise
Combine four parts mayonnaise with one part fish sauce. (This proportion is pretty loose and is based largely on our love of fish sauce. Add the fish sauce to taste and, if you really can't stand the stuff, leave it out. P would probably say otherwise.)

Fry the tofu in the oil until browned on all sides, then remove the tofu and set aside (setting these on paper towel helps drain away excess oil). Layer the ingredients on the baguette, beginning with mayonnaise and finishing with a dollop of the sweet chile sauce (See? I told you this sandwich was all about the condiments).

[If you're looking to make an entirely vegetarian version, omit the fish sauce and maybe try frying the tofu in coconut oil or adding a splash or two of chili oil as the tofu fries. If you're looking for something a little less wholesome, look no further than the
bánh mì at Momofuku Ssam Bar in New York for a little inspiration. And yes, we plan to go there when we visit the city in a few weeks.]

Monday, February 25, 2008

Here we go, a-waffling

Lately, the weather has been gorgeous in Portland. Not only that, but the weather has been gorgeous ON THE WEEKEND. Wonder of wonders. It's been the kind of weather that makes you forget its only February and spring is still over a month away: sunny, clear, and warm (in comparison with the usual winter weather, of course). We've been so excited to closet our rain gear and winter coats that we haven't much felt like spending time inside, which has necessitated more eating out than usual.

A few weeks ago we had one such beautiful Saturday and, though we were overflowing a bit in the leftovers department, we decided to have lunch out at a food cart we've been meaning to try. Despite my normal aversion to all things fast food, I am a sucker for the food cart. There is something very jolly about a little van or trailer packed with people and food (admittedly this is probably jollier for me than for those who are packed), serving tasty and often unusual treats. I also like the fact that I'm buying the food from the person who cooks it, enabling me to properly thank my chef for a satisfying meal. And, yes, it's fast...and sometimes that's fun.


Mississippi Avenue in North Portland has become a kind of haven for food carts. The neighborhood is one of our favorites and every time P and I stroll the streets I seek out the carts with my eagle eye, looking for any that I haven't seen before and reminding myself of the ones I am aching to try (ridiculously, up until a few weeks ago we had tried not-a-one). Here is the range I've noticed:
Baked goods/juice , Filipino, Mostlandian, good old fashioned BBQ and a recent addition, a waffle cart.

The waffle cart, Flavourspot, used to have just one location, on North Lombard - a bit of a trek, which partly explains why we had yet to try it. However, they recently opened a second location on Mississippi, from which they now serve their sweet and savory waffle
sandwiches - tasty waffles wrapped around an assortment of ingredients from lemon curd and whipped cream to sausage and maple spread.

I don't know if the world is divided into pancake people and waffle people in the same way that it is divided between those who listen to the Beatles and those who prefer the Rolling Stones (I like both, but then, I'm a bit of an anomaly); if it is, I fall decidedly on the side of the waffle. You may try to convince me otherwise, but in the great battle between waffle and pancake, I know where my loyalties will always lie. Where the waffle's texture is perfectly balanced between a buttery crisp exterior and a light fluffy interior, the pancake's is uniformly flat and spongy. Where the waffle delightfully stands up to the maple or other syrup you drizzle o'er its surface (and into its dimples), the pancake quickly becomes soggy and unappetizing. Try as you might to dress up a pancake, I will always see it for what it is: a poor substitute for a waffle.

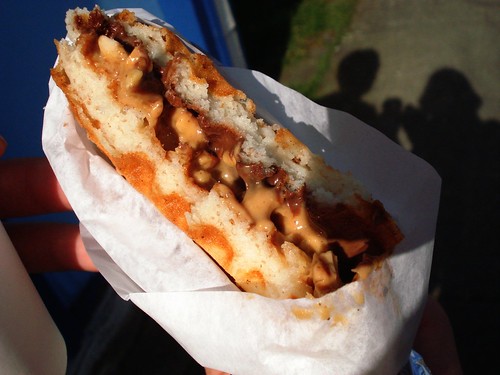
Flavourspot offers some damn fine waffles. The exterior is perfectly crisp and buttery (but not overly greasy) and the inside is airy, but still chewy. The fillings range from traditional - butter and powdered sugar; to savory - a waffle take on a croque monsieur; to decadent - a waffle wrapped around an ice cream bar (seriously). I decided on the Sweet Cream with Jam (whipped cream cheese and Strawberry Jam) and P went with the (Veggie) Sausage and Maple. Both were fantastic and we devoured them quickly on the lawn chairs next to the cart. While immensely satisfied, we weren't yet sick, so we decided to share a third waffle: chunky peanut butter and nutella. I was plenty sick after that, but oh, the glory of the waffle...


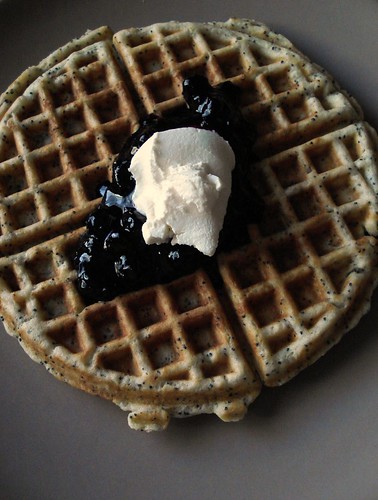
I was so inspired by the success of our waffle cart outing, that I decided to make my own. Waffles are one of those foods for which mixes abound, and yet they are incredibly easy (and far superior) if you make them yourself. The key is the butter, which contributes to the pleasant crispness and lightness and also aids the release from the waffle iron. I modified a recipe from the Joy of Cooking to make my Poppyseed buttermilk waffles, topped with mascarpone and blueberry-lemon syrup. I've included the basic waffle recipe below, as well as the modified version.

I discovered the pleasures of waffles for dinner while studying in Norwich, England. A favorite restaurant of mine was
The Waffle House, which served everything waffle, sweet and savory concoctions alike; the fresh spinach, potato and chickpea curry was my favorite for dinner. (Portland, too, boasts a waffle restaurant, but I have yet to try it.) You can use the basic recipe below to make savory waffles, just omit the sugar in the recipe. Serve them with sundried tomatoes, goat cheese and arugula, or with a rich mushroom sauce. I strongly abide by the traditional adage, "a waffle a day keeps the devil at bay."
_____________

Basic Waffles
from Joy of Cooking

[You can vary the amount of butter in this recipe. Joy offers three options: 4 tablespoons for reduced fat, 8 tablespoons (1 stick) for light and fluffy, 1/2 pound (2 sticks) for extra crunchy and rich. I happen to adore butter, but I went with the middle option and was perfectly satisfied with the richness of the waffle. Any more butter and I fear the waffle may have melted on my plate]

Preheat a waffle iron. Whisk together in a large bowl:

1 3/4 cups all-purpose flour
1 tablespoon baking powder
1 tablespoon sugar
1/2 teaspoon salt

Thoroughly blend in another bowl:

3 eggs
1/4 cup to 1 cup (1/2 to 2 sticks) butter, melted
1 1/2 cups milk

Make a well in the center of the dry ingredients and pour in the wet ingredients. Combine with a few swift strokes of the whisk. Spoon about a half cup of the mixture into your pre-heated waffle iron and cook until steam has stopped emerging from the cracks in the iron and the waffle releases easily when the lid is opened.


Poppyseed buttermilk waffles
with mascarpone and blueberry-lemon syrup

Adapted from Joy of Cooking


To make the waffles:

Prepare the waffles as above, but decrease the baking powder to 2 teaspoons and add 1/4 teaspoon baking soda and a 1/3 of a cup of poppyseeds to the dry ingredients. Substitute buttermilk for the milk.

To make the sauce:

Put about a cup of berries into a pan with the juice of a small lemon and 1-2 tablespoons of agave syrup (substitute sugar if you don't have the syrup on hand). Cook, stirring, on medium heat until the syrup thickens.

Enjoy the waffles with a drizzle of blueberry-lemon syrup and a dollop of mascarpone.

[These would be delicious on a brunch menu if you're cooking for friends. The waffles keep well in a 200 degree oven. Or, you could do as we did and go it alone (together). That way, you can freeze the leftovers in plastic and enjoy them throughout the week, for a wholesome (read: decadent) start to your day!]

Sunday, February 17, 2008

the duck that laid the golden egg

Thanks to a fellow food-obsessed friend, we were introduced early this year to the winter joys of Hillsdale Market. After a recent Oregonian article, apparently so did everyone else. While small in comparison to the Portland State market during the summer, Hillsdale offers more face-to-face time with growers and certainly enough produce to make it easier to eat locally during this season. Two weeks prior, we showed up to the Sunday market at a leisurely hour and, while certain covet-able foods were sold out, we managed to go home with a bounty of heirloom produce. With this in mind, we decided to get there early for the most recent market day only to find a packed parking lot and crowds of people where only fog and a handful of shoppers had been two weeks before.

"Eggs!" we both exclaimed, and immediately split up to make sure we'd get some fresh from a local farm. Our usual go-to stand was sold out so A ran to the Kookoolan stall (our chicken and rabbit supplier) only to find they, too were out of chicken eggs. In their place, she returned with a carton of duck eggs and I don't know if we've ever been so thrilled to take home the also-ran. We went for chicken eggs and left with duck eggs - that seems like a pretty good consolation prize, right?

Now, as soon as I get home from a typical grocery outing, I set about opening everything we bought at the store, skimming little samples off the top of each food. A usually mocks me mercilessly for this, but with the duck eggs, she was on board. We both knew we had to see what they were like.

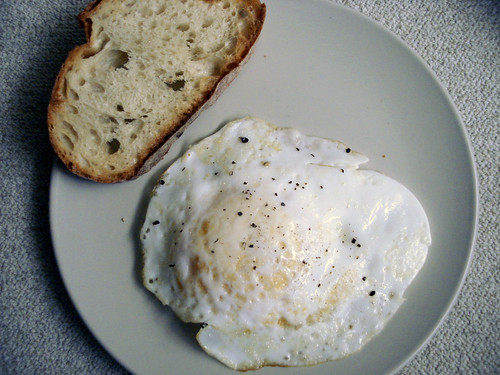
Duck eggs are pretty much the ugly duckling of the egg world: blueish-brown, splotchy, and mammothly-proportioned. Ours were so overgrown that the carton tabs were strained a full inch away from closing. Upon cracking through the dense shell, though, there before us was the most beautifully orange (and huge) yolk we'd seen. (Not to keep this metaphor running, but I wonder how swan eggs taste....?) Into the pan it went and soon we were enjoying duck eggs over-easy, jostling to sop up all of the just-cooked yolks with our toast. With a higher fat content than chicken eggs and an amazingly savory flavor, this egg was really exceptional.
We knew then that we would have to make something to showcase their flavor that night.

Though it had been a while since we'd made fresh pasta, we figured there could be no better occasion to pull down the pasta maker than for a rich egg dough. Wanting to keep our meal simple, we decided to tweak the classic Roman dish cacio e pepe (pasta with sheep's cheese and black pepper) to use black pepper-flecked pasta in place of the pepper in the sauce. If you've overlooked black pepper in the past as just a seasoning afterthought, this is the dish to reintroduce yourself to its sharp, slightly sour-hot taste.

And, if homemade pasta isn't in your plans, the classic
cacio e pepe is a flavorful and easy dish to knock out. We've included the directions for both versions; if you go the pre-made pasta direction, check around to see if you can find fresh pasta at a market in your area.
__________________

Black Pepper Pasta
Adapted from Chez Panisse Pasta, Pizza & Calzone

The basic proportions:
1 cup flour
1 egg
1 tablespoon freshly cracked black pepper
[we did 2 cups flour, 2 duck eggs, 2 tablespoons pepper and it was just enough for four servings]

By hand: Scoop the flour into a mixing bowl, make a well in the center of the flour and crack the eggs and pepper into the well. Whisk the eggs with a fork, slowly incorporating more and more of the flour from the sides into the mixture until is beginning to come together. Knead it until it balls up in the bowl, then turn it out onto a floured work surface and knead for five minutes. Add a little olive or water if it feels too tight, a little more flour if the dough seems wet. Rub with olive oil, cover with plastic and let rest for 15 - 45 minutes.

Alternately, by food processor: Throw all of the ingredients into the food processor and pulse until it balls together. Turn the dough out onto a floured work surface and continue as above.

Rolling out the pasta: After the dough has had a chance to rest, break off a golf ball-sized piece and flatten it slightly. Run it through a pasta maker starting at the widest setting (1) and continuing until about the number 6 setting. Flour both sides of the sheet lightly and run it through the tagliatelle/fettucine (wide) blades of the cutter. Set the pasta aside on a sheet until you are ready to boil it and continue with the rest of the dough.

Making the sauce: Bring a pot of water to a boil for the pasta. Meanwhile, grate 1/2 pound pecorino romano cheese or other hard, sheep's milk cheese and chop up about 3 tablespoons of Italian (flat-leaf) parsley. If you use black-pepper pasta, you can go ahead and skip this next step with the pepper. If you are using plain pasta, toast 1-2 tablespoons of whole black peppercorns in a dry skillet over medium-high heat, until they become fragrant. Transfer them to a mortar and pestle or wrap them in a kitchen towel and coarsely bash them open.

When the water has come to a boil, throw in the noodles and cook about 45 seconds to 1 minute. Before you drain the pasta, scoop out 1/2 cup of the cooking liquid and set it aside. As you drain the noodles, toss the cheese (and, if using plain pasta, the crushed black pepper) into the still-warm pot with the cooking liquid and quickly mix it together. Throw the pasta back in the pot along with the parsley and toss everything to coat!

Monday, February 11, 2008

towards a new theory of convenience

What A didn't mention about our ill-fated quiche attempt is that our obsessive interest in cooking and our new determination to eat more locally and sustainably means that we have absolutely zero "convenience" foods on hand. A year ago, if you'd opened our cupboards, there would have been far fewer heirloom beans and whole grains; their absence filled by a few microwaveable Indian foods or Annie's mac & cheese cartons. At the very least, we might have had some frozen garden burgers that could fill in for dinner in a pinch.

Now, if you look in our freezer, we've got ten pounds of blueberries, soup stock, green chiles, wonton wrappers, limoncello, a rabbit, a chicken, and a ziploc bag of chicken necks and feet. Yeah, it could make a pretty delicious meal, but not in any sort of reasonable week-night-dinner time frame. While we love cooking from scratch (perhaps to a fault), there can be something relieving about being able to peel off a wrapper and bake for 15 minutes. Most of what we had in our pantry would have probably required an overnight soaking or at the very least, 2-3 hours of slow cooking. There is no falling back on a plate of quick nachos when the black beans will take a day to cook, not a minute to open.

Not that I miss frozen pizzas, but our self-imposed way of cooking means a lot more planning and a lot less free time, right? Only if you accept the premise that "convenience" foods are marketed under. Primarily, quick-cook products depend on the belief that in the balance of time versus enjoyment, the scales will always tip in favor of saving time. While it's true that a lot of from-scratch meals require advanced notice and lots of dedicated attention, many dishes that we're used to consuming pre-prepared only take an extra ten minutes to make by hand.
Those ten minutes translate into such a better flavor that for A and I (as I'm sure you all could guess), it's simple to choose the extra work over the easily bland.

The other issue that plays into this effort vs. pleasure debate is that a lot of people seem convinced that cooking is some old-fashioned drudgery. I can go off on a diatribe about how our society doesn't value the knowledge and intelligence inherent in physical acts, but I'll keep it to this: I believe that many people think that cooking isn't enjoyable because, to them, preparing a meal equates with heating up something that's already been made. There is no ownership over the flavors, no problem-solving, and no skill. Maybe it is just the socialist in me speaking, but I think that most people enjoy applying their knowledge and ideas to projects, feeling like they are doing something essential and good. Making a meal from scratch satisfies a creative need, as well as our tastes.

In truth, it is our own fault that we couldn't figure out a quick alternative to a quiche - we had plenty of ingredients on hand to make simple, satisfying meals, we just weren't seeing them for all of the dried beans we had.

So, with this post, A and I are going to start posting an occasional series of recipes that revisit "convenience." It'll be a way to share dishes that are quick to make, rely on pantry staples, and reinvent foods that we are all used to buying pre-made, but really don't require much more time to make yourself. To get it started, it seems only fitting to start with a dish that seems to be the antithesis of quick: stock. The best stocks always take hours of slow simmering, and often a little bit of roasting before the ingredients go into the pot. But A and I have discovered the beauty of simple Japanese soup bases, and that means a homemade stock in about twenty minutes.
____________

Dashi Broth
Adapted from A New Way to Cook by Sally Schneider

1 ounce dried kombu kelp
5 cups water
1 ounce dried bonito shavings or furikake (substitute 1 ounce of dried nori for a vegan version)
1/4 - 1/3 cup tamari or mild soy sauce (depending on taste)
2 tablespoons rice vinegar
1 inch-long knob of ginger, peeled and sliced
2 teaspoons sugar

Place the kelp and water in a medium saucepan and slowly bring to a simmer over medium-low heat, about 10-15 minutes. Remove the kelp with tongs or a slotted spoon and discard. Remove the pan from the heat and add the bonito shavings (or nori). Do not stir. When the bonito has sunk to the bottom, after a minute or two, strain the broth through a fine strainer. Press the remaining bonito or nori to extract all the liquid, then discard the solids.

Return the dashi broth to the saucepan. Stir in the tamari, vinegar, ginger and sugar. Bring to a simmer over low heat and keep warm as you add your desired soup ingredients.

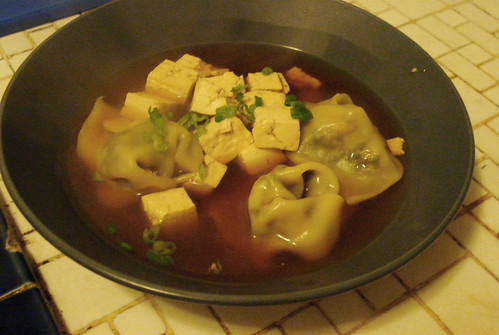
The last time we made this soup, it was so quick that we ended up making wonton-like mushroom dumplings and the whole meal still took only an hour! Still, we do understand that not everyone has dumpling-making in their evening plans, so our other favorite use for this stock is to toss in some cooked soba noodles, cubed tofu and bok choy. Just remember to sprinkle some thinly slice scallions on top for their bright crunch.

Thursday, January 17, 2008

the simple potato

Its only the third week of the year and A is already worried that we are falling behind on our resolutions. What started out as her anxiety about winter malaise ended up as a weekend filled with projects (homemade granola, bagel chips, dried kiwis, and our first attempt at no-knead bread) wedged in between outings (wine tastings, feeding our market cravings at Hillsdale, and trying new salts at the Meadow). She was definitely in one of her epicurean Laura Ingalls Wilder moods, when she wants to make everything from scratch and live off the grid, but still take advantage of all the city has to offer.

To ease back into the work week after a hectic weekend, a simple meal was in order. What simpler than the potato? While I've never enjoyed baked potatoes (that crispy skin is their only redeeming quality, don't try to convince me otherwise), can you think of a dish in which potatoes aren't delicious? They may very well be the hog of the vegetable world - versatile, satisfying, eminently tasty. Whether roasted with a little sea salt, french-fried, mashed, scalloped, twice-baked (now, those are a different story), added to a stew, stuffed in pierogi, or formed into gnocchi, the potato can fill so many roles quite gracefully.

Given the potato's easy appeal, the UN Food and Agriculture Office has declared 2008 to be the Year of the Potato, in an effort to draw attention to world hunger and issues confronting farmers. (Incidentally, it's also the year of the Rat [mine!]). Their site includes interesting reports on topics such as how Andean farmers are preserving tuber biodiversity to how potatoes can serve as an agricultural tool for women's empowerment. Even better, it provides me with more trivia for my already trivial mind (Europeans consume 96 kilos per capita annually!) and a project for growing potatoes in a large bucket. Since A and I want to expand our container gardening this year, I think this may well have made it onto our list of projects.

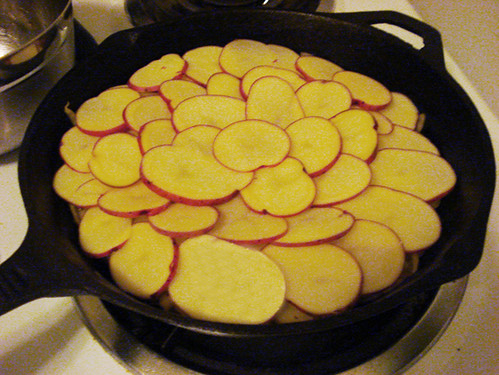
About a year ago, we came across two fantastic variations of a potato galette in an issue of Gourmet. This basic potato cake is layered with contrasting ingredients and crisped in a skillet, making a very beautiful and filling dish that would adapt well to all sorts of seasonal combinations. Morels and ramps with new potatoes in Spring, beets and their greens in the Fall, a little apple sliced in could be nice, as well. With what we had available, we knocked out a version based on a timbale recipe I'd recently seen that paired the potatoes with fennel and bosc pears. The fourme d'ambert is far too runny of a blue to be layered inside without making the whole thing stick to the pan, so crumble the cheese over the finished galette and broil briefly to melt, or just serve the hunks of it alongside the galette wedges. (If you'd like to vary the recipe and layer cheese inside the galette, good, firm cheeses like cheddar or fontina should hold up.)
___________________

Potato, Fennel, and Pear Galette with Fourme d'Ambert cheese

1 1/2 lbs. potatoes (we used red creamers for this, but deep blue potatoes worked great for the kale version we'd previously made)
6 tablespoons butter
2 garlic cloves, sliced
1 medium fennel bulb, halved and cored
1 ripe bosc pear
1/4 lb wedge of fourme d'ambert
kosher salt and fresh ground black pepper

Begin by slicing the fennel 1/8 of an inch thick. Melt two tablespoons of the butter in a cast-iron skilled over medium heat. When it begins to smell fragrant, toss in the fennel and garlic slices and saute, stirring occasionally. When the fennel is just beginning to turn translucent, season to taste with some salt and black pepper. Continue cooking until the fennel has softened and its edges have just begun to brown. Remove from heat, transferring the fennel to a bowl and wipe out skillet.

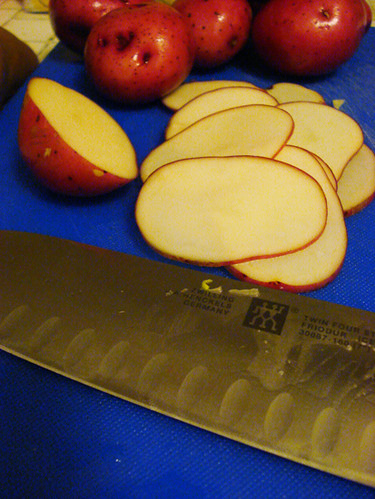
While the fennel is cooking, thinly slice your potatoes about 1/16 of an inch. A mandoline will make short work of this and keep the thickness consistent. Heat another two tablespoons of the butter in the skillet over moderate heat and, as it melts, halve, core and thinly slice the pear. There is little need to worry about browning because you will quickly assemble the galette in the pan.

Brush the melted butter around the skillet and, with any excess, brush a sheet of aluminum foil that is slightly larger than the skillet you are using. On the stove, quickly begin layering about half of the potato slices in the bottom of the hot skillet, working inwards from the pan's edge in a spiral, overlapping each previous slice. Sprinkle with cracked pepper and kosher salt. Layer the pears in the same fashion on top of the potatoes, then cover with the cooked fennel, spreading it thinly into a single layer. With the remaining potatoes, cover the fennel with a final layer of overlapping slices. Brush with olive oil or a bit of melted butter and season with pepper and salt. Place the foil butter-side-down on the potatoes and weight down the galette by placing a heavy pot that just fits inside the skillet on the foil, pressing slightly.

Cook 10-15 minutes until the bottom layer of potatoes have crisped. Remove the pot and foil from the skillet and set aside. Holding a sheet pan tightly over the skillet, flip both over together, inverting the galette onto the sheet. Take a second baking sheet and place it over the galette on the first baking sheet. Hold both tightly together and invert the galette again. Brush the potatoes with a bit of olive oil or melted butter, cover with the skillet and invert once more into the pan. Return to moderate heat and cover with the foil and stockpot for another 10-15 minutes.

If you'd like to melt the cheese into the potatoes and really open up its aroma, preheat the oven to broil, remove the foil and stockpot and crumble the fourme d'ambert over the top of the galette. Place the skillet in the oven and broil lightly, watching that it doesn't brown too much. Otherwise, just go ahead and cut healthy wedges of the galette and serve alongside slices of the
fourme d'ambert.

Monday, January 14, 2008

if at first you don't succeed, chai, chai again...


I've had a hankering for Indian food recently. Not your everyday, superficial, tip of the tongue need for something salty or sweet, but a deep down, pit of the stomach sort of desire. I wanted the spice, the tang, the layers of flavor that somehow remain distinct in channa masala or saag.

Indian food is something P and I have always found difficult to recreate in the kitchen. We can make pretty satisfying curries or dal, but they always seem to lack the depth you find in a restaurant. Still, we had recently discovered a dal recipe from the spice shop we visited in Montreal (found here) and decided to throw caution to the wind, feeding my hankering with a home-cooked meal.

The dal needed an accompaniment, so I rooted through the only Indian cookbook we have (not a standout - this is clearly one of the areas in which our cookbooks are lacking) and found a recipe for aloo gobi, or stewed potatoes and cauliflower. Then, we rounded out the meal with a little homemade chai (recipe below) and naan.


Flushed with the success of my bread last weekend, I decided to start the year off right and outdo my own resolutions. I set out to make bread every two weeks? Seriously, that was a weak promise. In competition with myself, as I typically am, I decided to win at my own game. However, as the middle finger on my left hand had been injured earlier that day in a freak trunk-of-the-car accident, it was up to P to do the kneading. I supervised closely and must say I was pleased with his technique (Let's face it, the man can whip up a souffle from a pile of sand. He's like a modern-day king Midas - turning everything he touches into butter), but the end result was not quite up to par. This was probably due to the fact that I opened the oven after 5-7 minutes (when the cookbook indicated the bread should be finished), noted that it looked uncooked, and popped it right back in for another five. It was tasty, but more cracker-like than naan. Next time, I suppose I might follow the recipe and see where that gets me.

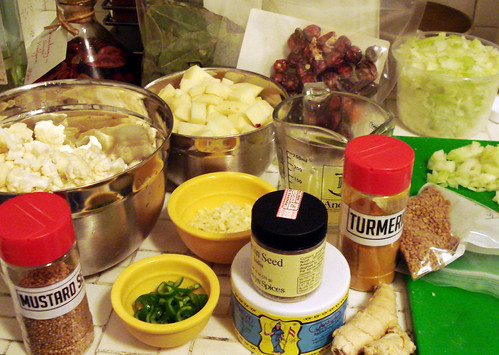
Luckily, the rest of the meal was everything I had hoped for. The aloo gobi was incredibly tangy, with a mustard bite; the chai a perfect sweet and warming complement to the spicy food. Even the naan had a great flavor and played its part well as utensil/shovel. The highlight, though, was the dal. The recipe calls for three different spice blends, to be added at different points throughout the cooking process. Toss in turmeric and bay leaf to start; cook for awhile, then add fenugreek, hot pepper, asafoetida (the resin of a middle eastern root that smells like it sounds, but gains a mellow onion-y flavor when cooked in butter) and ginger; cook a little longer, then throw in cumin, garlic, mustard seeds, and cayenne to finish.

Therein reside the secrets that catapulted this meal worlds beyond any other Indian meal we've made: more cooking, more spices, better timing. Every flavor of the dal was delicately melded together, while remaining discernible. A taste began with the bite of garlic and cayenne, eased into flavors of onion and fenugreek, and echoed with the herbal notes of the bay leaf.

I was indeed satiated.
_______________________

Easy Chai:

1 cup water
1 cup milk (we use soymilk - I like the nutty flavor)
3 tsp. black tea, such as Assam or Darjeeling (or a mixture)
3 peppercorns
3 cardamom pods, bashed
2 cloves

Combine all ingredients in a medium saucepan. Heat over medium-high heat until boiling, stirring occasionally and increasing the frequency of stirring as it gets closer to boiling. Let the liquid foam up a few times - the foam is delightful. Take off the heat and strain into a bowl or, if you trust your aim, directly into two small mugs. Stir in a big spoonful of honey (or a smaller spoonful of sugar) and you're done!

This recipe is a little milder than what we normally make, but it's a good jumping off point for experimentation. I like to make it with a little more pepper; you may prefer a stronger tea flavor, or more cardamom. Also, feel free to expand the recipe - sometimes we make 1 1/2 or two times as much and have it in a pot; other times we just want a taste and the smallish mugs work out fine.

Friday, January 4, 2008

resolutions

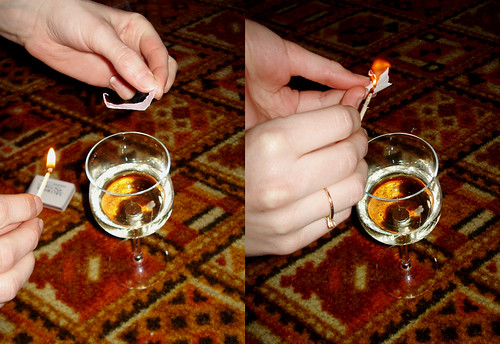
To ring in this new year, our friend Kathleen introduced us to a great tradition, the details of which I probably only partially paid attention to. What I remember of it is that you write all of your resolutions on a small scrap of paper, burn it over your glass of champagne and gulp down the wine, ashes and all. I think it began in some Eastern European country where the locals likely initiated the tradition in order to keep warm. When you have nothing left to throw on the fire, what is there? Your hopes and dreams for the next year! Set 'em alight! I'm not going to get too caught up in the potentially awkward symbolism of burning your promises - let's all just focus on the part of the custom where you ingest and internalize your wishes. And - bonus! - we didn't accidentally set fire to anything else (sorry Marty and Chuck - this could have been your chance to replace the carpet at the beach).

A and I both took a particularly long time writing out our resolutions because this year we made ourselves sit down and actually think about what we wanted to accomplish over the next 365 days. Inevitably, we got long-winded. What resulted probably says more about our respective personalities than about our goals:

P's resolutions:
-preserve more foods
-improve my baking
-read more often (and more of the books I've been putting off)
-commute more by bike
-experiment more with letterpress
-learn about new food cultures
-use our cookbooks more
-expand our gardening
-explore more of the city


A's resolutions:
-jar tomatoes and sauce
-bake bread once every two weeks
-read at least two nights a week
-have more plants and tend to them better
-volunteer with Slow Food
-buy a chord book & tuner and pick up the guitar again
-go climbing once a month
-blog post once every two weeks

Looking over our two lists, we resolved to do many of the same things, but the differences in approach are revealing. Whereas I would craft broad directives (read more), A would set tangible benchmarks (read two nights a week). Sure, mine may be a little vague or subjective, but let's face it; they're easier to claim success at. Still, whenever we'd ask friends about their resolutions, we kept noticing how similar ours actually were. Instead of our task-oriented ideas, others would mentioned lifestyle or character-changing goals like "living more healthfully" or "taking a more relaxed approach to life." In every instance, A and I wrote about specific activities that could propel our lives in a new direction, while most of our friends declared resolutions that were more end goals of how they'd like to see themselves. Funny. I guess A and I aren't much into building character.


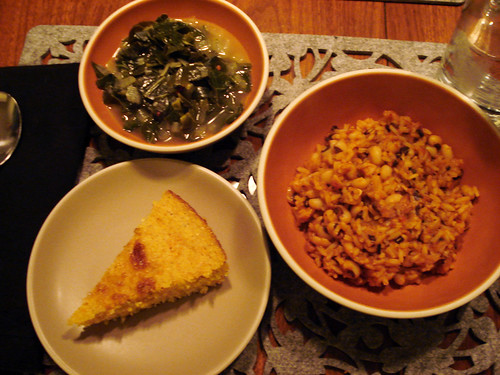
So, to make sure that we had full bellies prior to starting all of our projects (seriously, canning and baking really work up an appetite), we decided to start off the year with a great, warming, Southern, and luck-filled new year's day dinner - hoppin' john, collards, and skillet cornbread.

We turned to the Lee Bros. again for inspiration and were not disappointed. Baking the cornbread in a skillet gives it a great crusty exterior that matches the coarse-ground bite of the cornmeal. The leftover stock from our "bog" played beautifully in the hoppin' john alongside the fresh-soaked black-eyed peas and the smoky richness of the ham hock. Cooking your black-eyed peas from scratch will get you over any aversion you may have had to the canned variety (isn't it true of most foods?). Originally, we'd planned to make our collards based on a recipe from Russell Street BBQ - the broth-y, stewed variety with plenty of onions and garlic. But given the winning streak we'd been on with the recipes from the Lee Bros. (4 for 4!), we decided to take a few hints from both sources and make our own tangy, spicy version. We left out the ham (trust me, there was more than enough to go around from the hoppin' john) and it didn't suffer at all - done with a homemade vegetable broth it would be a satisfying vegetarian side.
_______________

New Year's Day Collards
(adapted from Lee Bros. Southern Cookbook & Russell Street BBQ)

2 tablespoons olive oil (or 1/4 pound slab bacon)
1 cup sweet onions, chopped

2 cloves garlic, thinly sliced

2 large bunches collard greens, stemmed, washed and cut into 1/4 inch strips

2 cups good (homemade) chicken or vegetable stock

1/4 teaspoon crushed red pepper flakes

2 tablespoons cider vinegar

1/2 teaspoon sugar
kosher salt and freshly ground black pepper to taste

1. Heat the oil in a 6-quart pot or render the bacon (3-5 minutes) over medium-high heat. Add the onions and cook until translucent and soft.

2. Lower the heat to medium and toss the garlic with the onions a few times until fragrant.

3. Add 2 handfuls of collards at a time, turning them in the fat and onions for a couple of minutes until they wilt; just steam them in the small amount of water that clings to them, but don't let them brown [make sure to constantly stir them]. Add more collards, 2 handfuls at a time, and turn them until they wilt, until all the collards are wilted in the pan.

4. Add the chicken broth and red pepper flakes. Turn the heat to medium-high and cook until the broth comes to a simmer. Reduce the heat to low, cover, and cook until the greens have turned dark, about five minutes.

5. Add the vinegar and sugar to the greens, toss to distribute, and cook, uncovered, about 5 minutes more to let the cooking liquid reduce and concentrate.

6. Season with salt and pepper and serve hot with cornbread.
________________

Wednesday, January 2, 2008

bog vs. bread: the battle royale

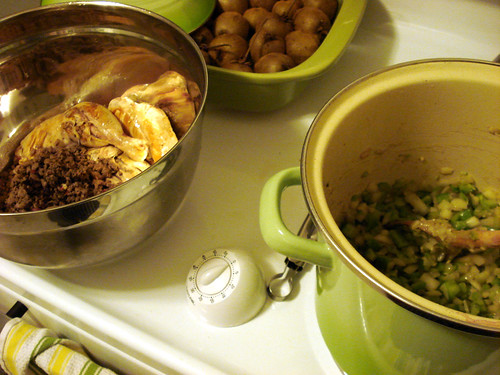
Since P was sick last weekend, we decided to have chicken soup for dinner. Of course, a little sore throat never got anyone out of anything, so P cooked most of the "chicken bog" (our inaugural recipe from the Lee Bros. Southern Cookbook) himself. For all who are wondering, chicken bog is a fantastically rich stew made with a whole chicken (including the giblets), sausage, green peppers, onion, chile, red wine, etc., etc. Because making this incredible soup was not enough, P also made the chicken stock (recipe also from the Lee brothers) that was the base for the "bog."

As my contribution to the healing process, I baked my first ever hand-made bread (no bread machine, mind you). The results were so thrilling that I was giddy for a couple of hours afterward. [It's true - she kept talking about how she was going to start making bread every day - P] I challenged my bread (recipe below) to his chicken bog; hence the name of this post. As a testament to the strength of our relationship, we agreed that the soup and bread worked better as a team than as a rivalry.
____________________

Basic Bread recipe (adapted from Jamie Oliver's Happy Days with the Naked Chef)

3 1/2 cups white flour
3 1/2 cups organic wheat flour
2 1/4 cups tepid water
3 1/4oz packets active dry yeast
2 tablespoons sugar
2 level tablespoons sea salt

extra flour for dusting


Stage 1: Making a well
Pile the flour on a clean surface and make a large well in the center. Pour half your water into the well, then add your yeast, sugar and salt and stir with a fork. (I chose to start this process in our Kitchenaid, rather than on the counter. Maybe not as "naked" as Jamie might have liked, but I could mix the ingredients with considerably less mess...)

Stage 2: Getting it together

Slowly, but confidently, bring in the flour from the inside of the well. Continue to bring the flour into the center until you get a stodgy, porridgey consistency - then add the remaining water. Continue to mix until it's thick again, then you can be more agressive, bringing in all the flour, making the mix less sticky. Flour your hands and pat and push the dough together with all the remaining flour. (Certain flours need a little more or less water, so feel free to adjust.)

Stage 3: Kneading!
This is where you get stuck in (his words, not mine). With a bit of elbow grease, simply push, fold, slap and roll the dough around, over and over, for 4 or 5 minutes until you have a silky texture and elastic dough. (Again, I started the kneading process with a dough hook in the mixer, then took it out and kneaded it by hand for awhile.)

Stage 4: First Rise
Flour the top of your dough. Put it in a bowl, cover with plastic wrap, and allow it to rise for about half an hour until doubled in size - ideally in a warm, moist, draft-free place. (I let the dough rise for more like an hour and a half. As if it were my baby, I obsessively monitored it all afternoon.)

Stage 5: Second Rise, Flavoring and Shaping
Once the dough has doubled in size, knock the air out for 30 seconds by bashing it and squashing it. You can now shape it or flavor it as required - folded, filled, panbaked, whatever - and leave it to rise for a second time for 30 minutes to an hour (or another hour and a half) until it has doubled in size once more. When it looks like the bread is getting close, you can go ahead and preheat your oven (350 degrees).

Stage 6: Cooking your Bread
Very gently place your bread dough on a flour-dusted baking sheet and into a preheated oven. Don't slam the door or you'll lose the air that you need. Bake in a preheated oven at 350 degrees for about 30 minutes until lightly golden. Move to a drying rack and allow to cool for half an hour before using.
_______________

This bread was deliciously home made - nice browned crust/fluffy and chewy interior. Great sandwich bread and perfect with the "bog." Of course, it wasn't bakery quality, but a friend of mine swears by the famous no-knead recipe that really does look like it popped out of a professional oven (and tastes like it too). I think I shall make that next. Sandwich bread for weekdays, bakery bread for fancy meals. Ah, the life of a baker.

Monday, December 10, 2007

sunday suppers


Sunday evenings have never been our strong suit socially. Around our home, Sundays are usually accompanied by a good deal of whining about the return to work and a throw-in-the-towel refusal leave our place or start new projects. We like to think that we are "preparing" ourselves for the coming week, but it is more likely just moodiness. It is a night to organize ourselves and get a start on meals for the week, making doughs and soaking beans, but that doesn't excuse us for behaving like shut-ins.

The pleasures of a simple Sunday supper may be just enough to shake us out of our reclusive habits. It is the perfect excuse to brush aside any thoughts of the next week for another few hours and just share in good food. When we invited two of our friends over this last Sunday for an early dinner (which it didn't end up being - sorry, guys!), we looked at it as a chance to make a warming, simple, seasonal meal. Now, I didn't say easy, because that would frankly be out of character, but our Sunday approach did mean we avoided the intensive multi-course meals we try to pull off on other weekend nights. A soup, a salad, a bread and some cookies. What could be more satisfying on a night that was just barely holding back flurries of snow?

I'd been looking at recipes for gougeres for quite some time now, namely because of a New Year's sandwich from the Zuni Cafe. Their photo was seductive - crackling crisp crust with bits of cheese oozing out. It didn't hurt that Judy Rodgers chose to stuff them with bacon and pickled onions, either. Knowing that I am not the baker in our relationship, I'd never gotten around to the recipe, but after having finally tried some at Beast, I had just been waiting for the right occasion. It certainly helped my confidence to have just read an eloquent explanation of gougeres on Michael Ruhlman's Elements of Cooking site - a blog filled with many other lyrical and edifying descriptions of the foundation techniques of the kitchen. At their heart, gougeres are founded on a
pâte a choux - a cooked dough that is among the more interesting bits of culinary chemistry that I've seen. Essentially, the steam of the cooking and the addition of the eggs develops a gluten structure that puffs up grandly in the oven. Add cheese to your basic dough and you have gougeres; sugar, and it becomes an eclair.

Supper:
Chanterelles on Toast
from Chez Panisse

Radicchio, Mint, Apple, and Asian Pear Salad with Buttermilk Dressing from Lucques

Apple and Chestnut Soup

Gougeres from Zuni Cafe

Cocoa Nib Butter Buckwheat Cookies from Pure Dessert with Fig Cake and Gorgonzola Dolce
______________

New Year's Eve Gougeres
Adapted from Zuni Cafe Cookbook by Judy Rodgers

Rodgers has an amazing voice that runs throughout her book - a quality that all good cookbooks should have. From her, I have perfected cooking dried beans and shelling chestnuts - reading it is like having Rodgers in your kitchen. I have been known to read this cookbook for fun.

For 20-24 Three-bite-sized gougeres:
1 cup water
3 tablespoons unsalted butter
1 teaspoons salt (a little more if using kosher)
4 ounces all-purpose flour (1 cup)
4 large eggs, cold
1/2 to 3/4 teaspoon freshly cracked black pepper
2 ounces Gruyere, cut into 1/4-inch cubes (about 1/2 cup) [
If you are planning on piping the dough into shapes, I would recommend coarsely grating the cheese, rather than cubing it.]

Preheat the oven to 400 degrees.

In a 2- to 4- quart saucepan, bring the water, butter, and salt to a simmer over medium heat. Add the flour all at once and stir vigorously until the mixture masses and detaches itself from the sides of the pan. Reduce the heat to low and cook, beating constantly, until the batter is very stiff and almost shiny, usually a few minutes. Off the heat, add the eggs one by one, beating thoroughly with a wooden spoon to completely incorporate each egg before adding the next. The mixture will initially resist each addition; you'll find yourself cutting through and slapping together slabs of slippery, warm paste until it gradually absorbs the egg and becomes sticky again. [
Transferring the dough to a stand mixer prior to adding the eggs will develop a better consistency and save your wrists - believe me, when Rodgers says "stiff," the dough puts up quite a struggle. Each egg will make the dough slough apart into slippery sheets, but just as quickly, it will become a thick paste.] The final mixture should be no hotter than tepid. [We found they even benefited from brief refrigeration.] Add the pepper to taste and stir in the Gruyere.

If you are proficient with one, transfer the batter to a pastry bag, and pipe 2- to 3-inch long bands onto a parchment paper-lined baking sheet about 2 inches apart. Otherwise use a spoon to scoop out a heaping tablespoon of batter per gougere and a second spoon to scrape it into a peaky mound on the prepared baking sheet.

Bake until firm and a rich golden brown, about 25 minutes [
They will likely need the full time to get crisp and retain their height - any of ours that we prematurely removed deflated quickly.] Inevitably, some bits of cheese will ooze and form a delicious, crispy bib on the edges of the gougeres. To check doneness, remove 1 gougere and pry open. The interior strands of dough should be tender and moist, but not mushy; if they are, close the gougere and return it to the oven to bake with the rest for another few minutes. If you are concerned that they may overbrown, simply turn off the oven and leave to finish cooking in the ambient heat.
_________________

Perhaps we should make a habit of such Sunday evenings.

Monday, November 26, 2007

a very bloggy thanksgiving

Did you seriously think we would let Turkey Day pass without a mention on the good ol' blog?
Of course you didn't. And of course we wouldn't.

Thanksgiving commands a very important place in my year. Forgive the apocryphal origins and bad pilgrim celebration stories. Ignore the football and the sometimes-awkward family and the fact that we usually end up wolfing-down our meals. And while it's true that for many families, Thanksgiving is more likely to come from cans and boxes than farmer's market stalls,
it is still one of the few (only?) American holidays devoted to food. No matter whether that food is fresh or packaged, nearly everyone that I talk with has strong memories (usually fond) of the holiday primarily because of the central place that food takes in all the festivities. Food makes memories stronger.

One day in the year that we get off of work and focus on food. Maybe everyone doesn't have a gourmet feast, but as a victory for eating, I'll take what I can get.

A and I rarely make the same meal twice. The same holds true for Thanksgiving. A part of me always wants to revive old meals and continue traditions, but part of me is so curious about new tastes. So we strike a balance. We do some dishes from family recipes, we create some from memory and we make a few new ones from recipes that we've culled over the past few lead-up months.


Personally, I find it fascinating how much technology and culture have intertwined over the course of even my life (A finds it slightly less interesting when I wax philosophical on this subject). I never would have expected that so much of our family's meal would come from the internet and yet, last Thursday, we were cooking a recipe from A's grandmother alongside new favorites we'd found online. Luddism is far from my mindset, hell, we bought our pie from a blog, but there is a part of me that wants for the marginalia of old handwritten recipes. Maybe I'll scrawl the web recipes onto index cards and spill some leftover gravy on them to make them look well-loved. Or maybe I'll just start looking for new recipes for next year.

So, with links when appropriate, here was the P & A 2007 Thanksgiving:


Mesclun salad with dates, goat cheese & molasses-garam masala vinaigrette
(with adjustments to the recipe's dressing)
________

Cider-glazed carrots
________

Brussels sprouts with Renee's chipotle-glazed nuts

________

Coconut curried uchiki kuri squash (from Viridian Farms)
________

Calmyrna fig and walnut dressing
________

Mushroom & Fennel Bread Pudding

________

Granny B's Velveeta Mac & Cheese (we're not all highbrow around here)
________

Mashed potatoes from memory
________

Mushroom Country Gravy
________


Bacon-Wrapped Turkey with Pear Cider Gravy
________

Cranberry Sauce with Orange Bitters & Harlequin
________

Buttermilk Pie with Cardamom and Nutmeg from The Acorn
________

Marty's Sweet Potato Pie

The standouts were definitely the bread pudding, which was a great (richer) take on traditional stuffing and the turkey gravy, which was worth all of the extra effort of pureeing roasted pears and cooking down the turkey-bacon drippings with hard cider. This was A's first time helping to cook the majority (read: all) of Thanksgiving. Perhaps I got us in over both of our heads, but we managed to get through it with only minor gravy scalds on our legs. The end count: 13 dishes for 8 people.